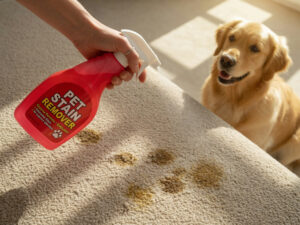
You can make a homemade enzyme cleaner for dog urine by fermenting citrus peels, brown sugar, and water together over three to four weeks. The process produces natural enzymes that break down uric acid — the compound responsible for that persistently returning dog-urine smell — rather than simply masking it with fragrance.
Key Takeaways
- Dog urine contains uric acid crystals that standard household cleaners cannot fully dissolve — biological enzymes break them down at a molecular level
- The DIY recipe calls for citrus peels, brown sugar, filtered water, and optionally a pinch of active dry yeast to speed up fermentation
- With yeast, the cleaner is typically ready in three to four weeks; without yeast, allow two to three months
- Homemade enzyme cleaners work well for routine accidents and maintenance — for heavily saturated older stains, commercial formulas with standardized enzyme concentrations tend to deliver more consistent results
What Is an Enzyme Cleaner and Why Does Dog Urine Specifically Need One?
Dog urine is stubborn because of uric acid. Uric acid forms crystals that bind tightly to carpet fibers, backing, and padding. Unlike urea or urochrome — the other main components of urine — uric acid is not water-soluble. Cleaning with plain water, or even a standard surface cleaner, often leaves uric acid crystals behind. Every time moisture reaches those dormant crystals, the smell activates again.
Enzyme cleaners work at a biological level. They contain proteins called enzymes that act as catalysts, accelerating the breakdown of specific molecules. For dog urine, the relevant enzymes include proteases, which break down proteins, and uricases, which target uric acid directly. Once an enzyme binds to a uric acid molecule, it splits it into simpler, odourless compounds that can be absorbed or dried away completely.
Commercial enzyme cleaners use concentrated, purpose-grown enzyme cultures produced under controlled conditions. A homemade version grows those same enzymes through natural fermentation. The underlying chemistry is identical — the main practical difference is enzyme concentration and consistency from batch to batch. That distinction matters when you’re deciding which type to reach for and when.

What Ingredients Do You Need to Make a Homemade Enzyme Cleaner?
The ingredient list is short and inexpensive. You likely have most of it in your kitchen already.
Core ingredients
- Citrus peels — roughly 1½ cups, from oranges, lemons, limes, or a mixture. The variety affects the scent of the finished product but has a minimal effect on enzyme activity.
- Brown sugar — 7 tablespoons. Brown sugar feeds the microorganisms that drive fermentation and enzyme production. White sugar can substitute, but brown sugar ferments a little more readily due to its molasses content.
- Filtered water — approximately 4 cups. Tap water works if you leave it in an open container overnight — this allows most of the chlorine to off-gas. Chlorine inhibits fermentation by suppressing the microorganisms you need.
- A clean glass jar or BPA-free plastic bottle — large enough to hold the mixture with some headroom for gas expansion.
Optional accelerator
- Active dry yeast — ¼ teaspoon. This single addition is the most significant shortcut in the recipe. It jumpstarts fermentation and typically cuts the wait from three months down to three to four weeks.
Start collecting citrus peels a few days before you plan to begin. Keep them in an airtight container in the fridge to prevent mold. A mix of whatever citrus you happen to use that week — oranges, lemons, limes — works perfectly well.
How Do You Make a Homemade Enzyme Cleaner? A Step-by-Step Guide
Preparation takes about ten minutes. The fermentation period that follows is mostly hands-off — a daily swirl is all the effort required during the wait.
- Prepare your peels. Cut citrus peels into rough 1-inch pieces. Smaller pieces expose more surface area to the liquid and help fermentation proceed more evenly. Remove any visible mold from stored peels before using them.
- Dissolve the sugar. Add 7 tablespoons of brown sugar to your jar. Pour in a small amount of filtered water and stir until the sugar dissolves. Add the remaining water to reach approximately 4 cups total. Dissolving first prevents sugar from sitting undissolved at the bottom.
- Add the citrus peels. Pack the peel pieces into the jar. They will float — that is expected. To keep them submerged and reduce surface-mold risk, place a small zip-lock bag filled with water on top as a gentle weight.
- Add the yeast (optional but recommended). Sprinkle ¼ teaspoon of active dry yeast over the surface. It will activate within a few hours; you should see small bubbles forming before the end of the first day.
- Cap loosely and label. Fermentation produces carbon dioxide. A tightly sealed lid builds dangerous pressure. Leave the lid slightly ajar, use a cloth secured with a rubber band, or poke a small hole in the lid. Write the start date on a label.
- Ferment in a warm, dark spot. Aim for a temperature of roughly 68–75°F (20–24°C). A kitchen cupboard away from direct sunlight works well. Swirl the jar gently once a day to keep the active layer mixed throughout the liquid.
- Strain and bottle. After three to four weeks with yeast (or two to three months without), strain the liquid twice — first through a fine-mesh sieve, then through cheesecloth or a coffee filter. The finished cleaner should be light amber in colour and smell faintly tangy and citrusy. A strong smell of rot or mold means the batch has gone wrong; discard it and start fresh with sterilised equipment.
The strained cleaner keeps for several months in a cool, dark place. Many pet owners keep a diluted spray bottle (1 part cleaner to 1 part water) handy for everyday spot treatment and reserve the undiluted version for more serious accidents.
To picture the process: imagine you use an orange for breakfast on Monday. You save the peel in the fridge. By Thursday you have collected enough peels from the week’s citrus. You spend ten minutes mixing the recipe on Friday evening, add a pinch of yeast, cap the jar loosely, and set it in a kitchen cupboard. By week four, vigorous fermentation has slowed, the smell is pleasantly tangy, and you strain it into a labelled spray bottle. You now have a full supply ready for the next accident.

How Long Does It Take for a Homemade Enzyme Cleaner to Ferment?
The timeline splits based on whether you use yeast.
| Method | Typical Time | Fermentation Activity | Best Suited To |
|---|---|---|---|
| Without yeast | 2–3 months | Slow; driven by wild microorganisms on the peels | Those who plan ahead or want to ferment large batches |
| With active dry yeast | 3–4 weeks | Vigorous bubbling within 24–48 hours | Most households wanting a quicker turnaround |
Ambient temperature is the other key variable. A warm kitchen at around 70°F accelerates fermentation noticeably. A cold garage or basement in autumn can stall the process significantly, especially without added yeast.
The most reliable indicator of active fermentation is consistent bubbling. With yeast, you should see activity within 24–48 hours. Without it, visible bubbling begins within a week or so. Daily swirling keeps the active layer circulating and helps prevent a surface film from forming on the liquid.
If you need to treat an accident today, a homemade enzyme cleaner isn’t the solution — the fermentation process cannot be rushed. Keep a commercial enzyme product on hand for immediate use while your DIY batch develops.
How Do You Apply a Homemade Enzyme Cleaner to Dog Urine Stains?
Correct application is as important as the cleaner itself. The two most common mistakes are applying too little liquid and removing the cleaner before the enzymes have had sufficient dwell time to complete the biological reaction.
For fresh accidents
- Blot, don’t rub. Press clean cloths or paper towels firmly into the stain to absorb as much urine as possible. Work from the outside edge of the stain toward the centre to avoid spreading it. Keep blotting until the cloth comes up mostly dry.
- Saturate with enzyme cleaner. Apply enough cleaner that it reaches the same depth the urine penetrated. On thicker carpets or carpets laid over padding, that means a generous pour — not a light mist from a squeeze bottle.
- Allow dwell time. Cover the treated area with a damp cloth or plastic wrap and leave it for at least 15–20 minutes. The enzymatic reaction requires both moisture and time. Blotting the cleaner up too early interrupts the process before it completes.
- Blot residue and air-dry. Absorb the excess liquid with a clean cloth, then allow the area to dry completely. Use a fan to speed drying. Avoid placing rugs or furniture back over the spot until the carpet is fully dry.
For older or dried stains
The process is identical, but plan to repeat it two or three times with 24 hours between each application. Dampen the area lightly with plain water before applying the enzyme cleaner — this rehydrates the dried uric acid crystals and allows the cleaner to penetrate the fibers more effectively.
If the urine soaked through to the carpet backing and padding, surface treatment alone often won’t fully resolve the odor. The padding acts as a reservoir and continues off-gassing smell back up through the carpet even after the surface appears clean. Understanding how to remove dog urine from carpet padding before starting can save a significant amount of repeated effort — the underlay is often where the worst of the odor is actually stored.
Does a Homemade Enzyme Cleaner Work as Well as Store-Bought Products?
For fresh stains and routine maintenance, a well-fermented DIY enzyme cleaner performs genuinely well. Pet owners who use citrus-peel fermentation report that persistent odors noticeably reduce after one or two treatments. The chemistry supports this: the fermentation process reliably produces the right class of enzymes for breaking down urine compounds when the recipe is followed correctly.
The practical gap opens up with older, heavily saturated stains. Commercial enzyme cleaners are produced with controlled cultures at standardized concentrations. A homemade version yields a variable enzyme mix that depends on fruit variety, ambient temperature, fermentation duration, and the specific microorganisms present. That variability makes results less predictable when treating heavy or longstanding contamination.
| Factor | Homemade Enzyme Cleaner | Commercial Enzyme Cleaner |
|---|---|---|
| Cost | Very low (pantry staples) | Higher per bottle |
| Enzyme concentration | Variable, typically lower | Standardized, higher |
| Ready-to-use time | 3–4 weeks (with yeast) | Immediately |
| Shelf life after straining | A few months | Often 1–2 years (sealed) |
| Batch consistency | Varies batch to batch | Consistent formula |
| Best use case | Routine maintenance, fresh stains | Old stains, heavily saturated areas |
If you want a benchmark for what a concentrated commercial formula achieves — particularly as a reference point for the standard you’re working toward with your DIY cleaner — the guide to the best enzymatic carpet cleaners for pet messes covers how these products are formulated and what to look for when comparing them.
What Are the Limitations of a DIY Enzyme Cleaner?
Understanding the limitations helps you use a homemade enzyme cleaner strategically rather than being caught off guard by where it reaches its ceiling.
- Variable concentration. Fermentation produces enzymes, but not at the precise levels that commercial products achieve. The activity in any given batch is unpredictable and influenced by multiple environmental factors.
- Declining potency over time. Enzyme activity decreases once active fermentation stops. A strained batch starts losing potency over several months, even when stored correctly in a cool, dark location.
- Mold risk if preparation is careless. An unclean jar, contaminated peels, or a fermentation environment that is too cold can allow mold to outcompete the beneficial organisms. Any batch with visible mold or a genuinely putrid smell should be discarded.
- Potential colour risk on pale carpets. Natural pigments from citrus peels and fermentation byproducts can occasionally affect lighter carpet fibers. Always test an inconspicuous area before treating a visible stain.
- Not a disinfectant. Breaking down organic matter is not the same as eliminating pathogens. In households with puppies, elderly pets, or immunocompromised individuals, a targeted disinfectant step after the enzyme treatment has fully dried and aired may be appropriate. Check with your vet if there are specific health considerations.
None of these limitations disqualify a homemade enzyme cleaner as a useful household tool. They define the scenarios where it excels and the ones where a commercial product is the more appropriate choice.
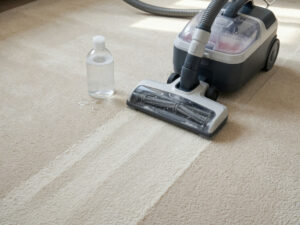
Can You Use a Homemade Enzyme Cleaner in a Carpet Shampooer?
You can add a thoroughly strained homemade enzyme cleaner to a carpet shampooer, but it’s worth understanding a couple of practical constraints before you do.
Straining matters more here than for direct spot treatment. Any organic particles left in the liquid can clog the machine’s spray nozzles or tank filters. Strain the cleaner twice before adding it to the shampooer — once through a fine-mesh sieve, then again through cheesecloth or a coffee filter — until the liquid runs completely clear.
More importantly, enzyme cleaners need dwell time. A carpet shampooer applies solution and extracts it almost immediately — that cycle doesn’t give enzymes time to break down uric acid crystals effectively. The better approach is to pre-treat stained areas with the enzyme cleaner directly, allow a 20–30 minute dwell period, then run the shampooer with a standard pet-safe formula afterward to extract residue. Use the enzyme cleaner to treat; use the machine to clean up afterward.
If you’re specifically looking for enzyme formulas built to run through a machine without clogging or leaving sticky residue, the round-up of enzyme cleaners designed for carpet shampooers explains what the machine-compatible versions do differently — particularly around viscosity and foam output.
What About Old or Set-In Dog Urine Stains?
Old urine stains are challenging for any enzyme cleaner, homemade or commercial, because the uric acid crystals have had time to bond deeply into carpet fibers, backing, and padding. Surface treatment alone rarely resolves them fully on the first pass.
A practical approach for dried, set-in stains:
- Map the full extent with a UV torch. Urine fluoresces under ultraviolet light. The visible surface stain is often much smaller than the actual affected zone — treat the full extent revealed under UV, not just what’s visible in daylight.
- Rehydrate before treating. Dampen the area lightly with plain water to reactivate and soften dried crystals. This opens up the fiber structure and allows the enzyme cleaner to penetrate more effectively than it would on bone-dry carpet.
- Apply generously and extend dwell time. Saturate the area and cover it with plastic wrap or a damp towel. Aim for 30–60 minutes of dwell time rather than the standard 15–20 minutes used for fresh accidents.
- Repeat after 24 hours. Old stains rarely resolve in a single treatment. Allow the area to dry completely between sessions before re-treating.
- Accept that padding may need separate attention. If urine soaked through to the underlay, the carpet surface can smell clean while the padding continues to off-gas odor upward. In severe cases where the smell persists despite multiple treatments, replacing the affected padding section may be the only permanent solution.
A homemade enzyme cleaner’s lower concentration means old stains typically require more applications than a commercial product would. If you’re dealing with a large area or a very long-standing stain, consider a commercial enzyme formula for the initial heavy treatment, then switch to your DIY cleaner for ongoing maintenance once the main odor is resolved.
How Do You Stop Dog Urine Odor From Coming Back?
Odor returns when any uric acid residue is left behind. Even a small amount is enough for the smell to reactivate each time moisture is present in the air or the carpet is cleaned. Permanent elimination means breaking down every crystal, not just the surface layer.
- Act fast on fresh accidents. The quicker a stain is treated, the less uric acid bonds to fibers and padding. Keep a diluted spray bottle of enzyme cleaner accessible in the area where accidents most commonly occur.
- Dry the area completely after treatment. Residual dampness without active enzymatic action encourages bacterial regrowth and odor recycling. Use a fan to fully dry treated areas before covering them.
- Check regularly with UV light. A black-light torch reveals missed spots, particularly along walls, under furniture edges, and in corners. Dogs return to spots where they can still detect urine scent — eliminating every trace breaks that cycle.
- Address the behavioral side. Odor-neutralizing sprays can reduce the scent markers that draw dogs back to a specific spot. If accidents are frequent or occurring in unusual locations, a conversation with your vet is worthwhile to rule out underlying causes.
For a broader framework combining enzyme treatment with proper drying technique and complementary cleaning approaches, the guide to removing dog urine smell from carpet covers several methods that work alongside enzyme treatment for consistent, lasting results.
Frequently Asked Questions
Can I use lemon juice instead of lemon peels?
No. Lemon juice ferments differently from lemon peels and doesn’t produce the same enzyme profile. The fermentation process relies on the organic matter in the peel — its oils, pith, and cellular fiber. Juice is mostly water and sugar and ferments as a simple yeast food rather than an enzyme precursor. Use peels only.
My DIY enzyme cleaner smells very strong after fermentation — is that normal?
A tangy, yeasty, or citrusy smell is completely normal and a good indicator of successful fermentation. A strong smell of rot, sulfur, or mold indicates a failed batch — likely caused by contaminated equipment, bad peels, or a fermentation environment that was too cold. Discard it, thoroughly clean your jar, and start fresh with dechlorinated water and fresh peels.
Can I use a homemade enzyme cleaner on hardwood floors?
Use caution. The natural acidity of a fermented citrus cleaner can dull or damage certain hardwood finishes — particularly polyurethane-coated floors. Test a small hidden area first. If you apply it to hardwood, blot dry immediately rather than allowing any liquid to sit on the surface.
Does baking soda and white vinegar work the same way as an enzyme cleaner?
No. Baking soda and vinegar work through acid-base chemistry, which temporarily neutralizes some odor compounds — but they don’t contain enzymes and can’t break down uric acid crystals. Vinegar can also set certain protein-based stains if applied incorrectly. An enzyme cleaner works at a biological level, which is why its effects on persistent dog urine odor are more lasting.
How do I know if my homemade batch has active enzymes?
Vigorous, consistent bubbling during the fermentation period is the clearest sign of the microbial activity responsible for enzyme production. A properly fermented batch also smells noticeably different from plain citrus sugar water — tangier, with a faint yeasty note. There is no simple home test for enzyme concentration, but a batch that fermented actively at the right temperature for the recommended period reliably contains enzymatic activity.
Is a homemade enzyme cleaner safe around pets and children?
A fully fermented, strained, and diluted citrus enzyme cleaner is generally regarded as non-toxic and pet-safe. Allow the treated area to dry completely before pets or children return to it. If anyone in the household has a citrus sensitivity, check with a relevant healthcare provider before use.
Can I freeze leftover enzyme cleaner to extend its shelf life?
Freezing denatures proteins, including enzymes, and degrades the cleaner’s effectiveness. Store the strained batch in a cool, dark cupboard and plan to use it within a few months. Refrigeration is acceptable for short-term storage, but slow fermentation may continue inside the bottle and gradually build pressure — leave the cap slightly loose if refrigerating.
What Is the Best Way to Get Started?
Making a homemade enzyme cleaner for dog urine is a practical, low-cost project that works on the same biological principle as commercial products. The ingredients are easily sourced, the process is straightforward, and the result — when properly fermented — tackles uric acid at its source rather than masking it.
Here is a straightforward starting sequence:
- Today: Begin saving citrus peels every time you use an orange, lemon, or lime. Store in an airtight container in the fridge. Collect roughly 1½ cups before starting the batch.
- Day 1: Dissolve 7 tablespoons of brown sugar in 4 cups of filtered water, pack in the peels, sprinkle over ¼ teaspoon of active dry yeast, cap loosely, and label with the start date. Store in a warm kitchen cupboard.
- Daily for 3–4 weeks: Swirl the jar gently once per day. Look for consistent bubbling to confirm the fermentation is active.
- Weeks 3–4: Strain twice — through a sieve and then cheesecloth. Bottle the finished cleaner. Dilute half-and-half with water in a spray bottle for everyday spot treatment.
- Ongoing: Blot fresh accidents immediately, saturate with enzyme cleaner, allow 15–20 minutes of dwell time, and air-dry with a fan. Repeat after 24 hours for older or more persistent stains.
While your first batch ferments, current accidents are worth treating with a commercial enzyme product to prevent odors from embedding deeper. The full guide to carpet cleaners for pet urine at bestcarpetcleanerforpets.com covers a range of commercial options that complement a long-term DIY cleaning routine well.
The enzyme cleaner market is moving toward pre-formulated DIY kits — concentrated live cultures designed to be activated at home in water — bridging the gap between commercial consistency and DIY economy. These products are becoming more widely stocked and could offer the cost advantages of homemade with the concentration predictability of commercial formulas. For now, the fermented citrus method remains the most accessible and well-established homemade approach, and it costs almost nothing to start.